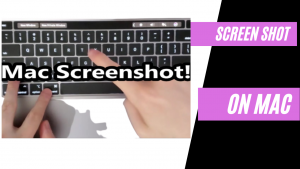
Keyboard shortcuts for taking screenshots appear directly on your Mac, but each technology captures a different part of your screen.
Matt Elliott Head Shot
Matt Elliott
January 25, 2020 8:03 PM Pt
Listen
– 03:44
CNET-BestBuy-MacBook Air
Ready, set, screen shot.
Sarah Tue / CNET
If you need to take regular screenshots on your MacBook or MacPro in your workflow, you need to know three simple keyboard shortcuts and a fourth with a MacBook with a touch bar. One of these technologies is a bit new. You may remember it from MacOS Mojave, but if you do not, make sure it is assigned to MacOS Catalina.
Be around even when we guide you by working with them as you take those screenshots. Apple gives you a fair number of options for easy saving, deleting and opening screenshots for markup, tools I have come to appreciate and use regularly.
And if you are looking for other tips, here are five ways to make your loud Mac fan less noisy and how to go back to your locked Mac if you forget your password.
Check it out: How to take a Mac screenshot
2:08
Command-Shift-3
This keyboard shortcut captures a screenshot of your entire screen.
Shift-Command-4
Use this keyboard combo to turn your cursor crosswise, you can drag and drop to select a part of your screen to capture it. Release the mouse button or trackpad to take the shot.
After hitting Shift-Command-4 you have several other options:
Press and release the space bar: Crosshair becomes a small camera icon, you can go to any open window. Click on the window where you want to take a screenshot. The screen shot captured by this method has a white edge with a little shadow around the window.
Hold down the space bar (to highlight an area, but before releasing the mouse button or trackpad): This option locks in the size and shape of the area, but allows you to replace it on the screen. This is easy if your initial selected area is off by a few pixels; To release a screenshot, hold down the space bar to release the mouse button before releasing it.
Hold down the Shift key (to highlight an area, but before releasing the mouse button or trackpad): Save the bottom edge on each side of the selected area with crosshairs, allowing you to move your mouse up or down. Bottom edge.
Without releasing the mouse button, release the Shift key and press it again to restore the right edge of your selected area. You can toggle between moving the bottom edge and the right edge by holding down the mouse button or touchpad and pressing the Shift key.
Up and down with the new 16-inch MacBook Pro
See all photos
16 inch MacBook Pro
16 inch MacBook Pro
16 inch MacBook Pro
+49 more
Shift-Command-5
A relatively new shortcut command introduced in MacOS Mojave (2018), this combination calls for a smaller panel at the bottom of your display with your screen capture options. There are three screenshot buttons that allow you to capture the entire screen, window or option of your screen.
Similarly, two video-recording buttons allow you to record your entire screen or its selection. There is an X button on the left to close the screenshot panel, but you can also press the escape key to exit.
There is an option button on the right. It allows you to choose to save your screenshot – desktop, document, clipboard, mail, message or preview and set a delay of 5- or 10 seconds so that your screenshot tool can queue up the attached items. .
By default, the Show Floating thumbnail option is enabled, which inserts some preview thumbnails in the lower right corner of your screen, similar to the screen shot process with iOS. Unlike your iPhone (99 899 on Amazon) you can turn off this preview thumbnail on your Mac. Finally, you can choose to show your mouse pointer in a screenshot or video.
If the screenshot panel is in your path, you can grab its left edge and drag it to a new location on your screen.
Touch bar bonus for MacBook: Command-Shift-6
If you have a 16-inch MacBook Pro or another model with a touch bar, did you know that you can take a screenshot of what is being shown on the touch bar? Press Command-Shift-6 to take a very wide and thin screenshot of your touch bar.
Touch Bar-ScreenshotJPG
Screen shot by Matt Elliott / CNET
Easy annotation
If you receive floating thumbnails, you will quickly gain access to the markup tool to quote your screenshot. You can swipe the floating thumbnail or let it slide automatically and it will be saved where you last saved the screenshot. Click on the floating thumbnail and it will open in the markup view preview window (but not the preview) with all the markup tools you found in the preview.
You can right-click on the floating thumbnail:
Save the screenshot to your desktop, document folder or clipboard
Open it in mail, message, preview or photo
Show in Finder
Remove
Open the markup preview window described above
Close (and save)
Adopting the new command-shift-5 shortcut slows down the long-term Mac screen setter, but I’m mostly using it for the ability to quote screenshots without using previews, and I can delete those screenshots quickly. The 5- and 10-second delay options are also useful and appreciated.